These instructions demonstrate how to replicate the FileMaker MYOB Essentials integration from the Databuzz FileMaker Essentials solution file in your existing FileMaker solution. The Databuzz FileMaker MYOB Essentials solution file – fmAccounting Link – currently includes the following examples:
- authentication with the MYOB Essentials API
- download Chart of Accounts from Essentials to FileMaker (GET)
- download Tax Types from Essentials to FileMaker (GET)
- download Account Types from Essentials to FileMaker (GET)
- download Account Classifications from Essentials to FileMaker (GET)
- download Contacts from Essentials to FileMaker (GET)
- upload Contact/s from FileMaker to Essentials (POST/PUT)
- download Inventory Items from Essentials to FileMaker (GET)
- download Invoices from Essentials to FileMaker (GET)
- upload Invoice/s from FileMaker to Essentials (POST/PUT)
- uploaded Payment/s from FileMaker to Essentials (PUT)
We are continually updating the fmAccounting Link files to include additional examples. If you would like to see an example for other Essentials endpoints supported by the Essentials API please let us know.
We recommend having the following links open in separate browser tabs when testing the integration:
Essentials API Getting Started
We also recommend using a free trial version of MYOB Essentials during testing – this will let you upload and edit MYOB Essentials data without affecting your live MYOB data. Once you have a happy with the integration you can switch to using your live Essentials Account.
Essentials API Setup
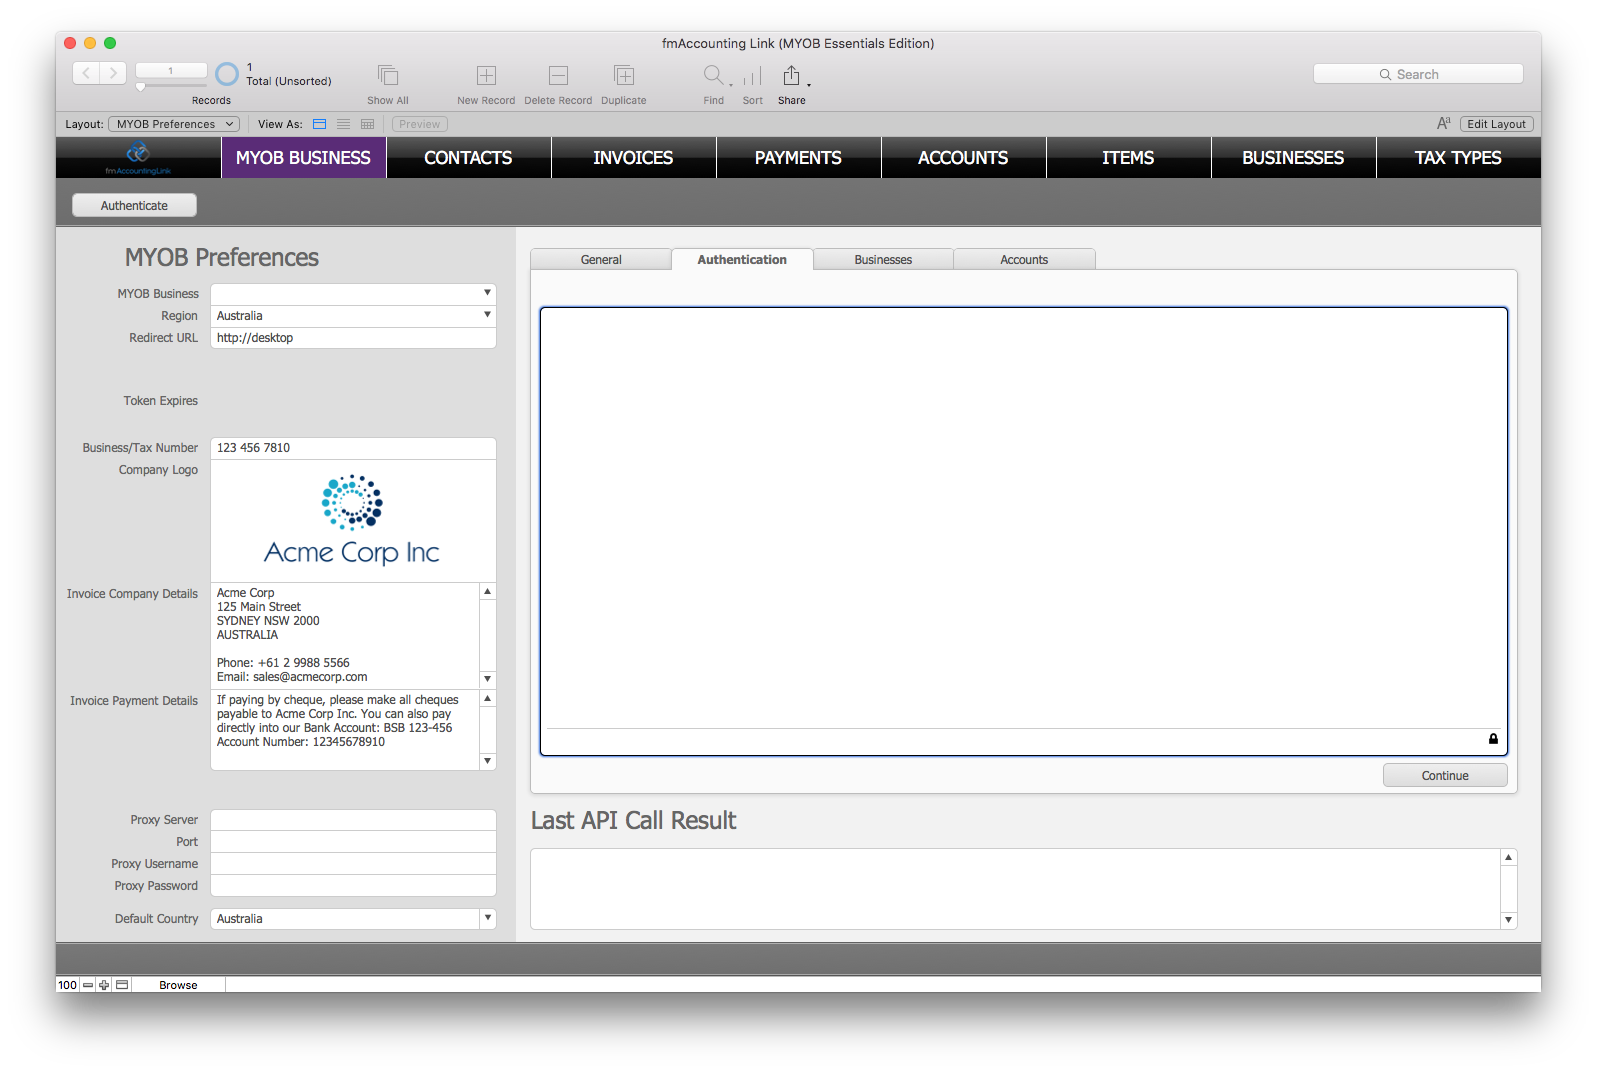
To begin click on the MYOB BUSINESS navigation button at the top of the screen which takes you to the MYOB Preferences screen where you can start the authentication process and select the Essentials Business you wish to use:

MYOB Business: leave this blank. Once you have authenticated and downloaded your list of MYOB Essentials Businesses you can select a Business from this list
Region: select Australia or New Zealand
Redirect URL: enter http://desktop
You are now ready to test that you can authenticate against the Essentials API. Click the Authenticate button at the top of the screen and the fmAccounting Link (MYOB Essentials Edition) file will attempt to connect to the API. If it is successful it will first prompt you to login to your my.MYOB account in the Web Viewer on the Authentication TAB (N.B. if you don’t see this login screen it means that you have already previously successfully authenticated with the my.MYOB server since you first opened FileMaker Pro and you can skip to the next step):

Enter you my.MYOB login credentials and click the Continue button. If you entered the correct my.MYOB login credentials another blank Web Viewer will appear (note the padlock icon in the bottom right hand corner of the Web Viewer):

MYOB has generated the required access tokens to use with API requests – these are hidden and not displayed on the Web Viewer. To store these in FileMaker Pro fields/variables and finish the authentication process click the Continue button again and the following dialog box will now appear confirming that you have authenticated successfully with the Essentials API:

You are now ready to select which of your available Essentials Business files you wish to work with when making API requests. Click on the Businesses TAB then click the Import All Businesses button to download the list of Businesses into FileMaker:
You can now select the MYOB Company File to use from the MYOB Company File list:

N.B. when it comes to integrating the authentication into your existing FileMaker solution you will need to copy these 2 fields from the Interface table:
APIKey
APISecret
as well as the values contained in those fields (they are the Developer API keys for the fmAccounting Link (MYOB Essentials Edition) solution). You can find these on the DEV Interface layout as well.
Testing the API is Working Successfully
Once you have authenticated and selected the Essentials Business you wish to use with future API requests you should make a few requests to confirm the API is working and you have authenticated correctly. A good way to do this is to download some data such as the Account Codes or Tax Types from Essentials to FileMaker:
- click on the Accounts TAB on the MYOB BUSINESS screen then click on the Tax Types TAB then click the Import Tax Types button. The full list of Tax Types from MYOB Essentials should be downloaded
- click on the Accounts TAB on the MYOB BUSINESS screen then click on the Account Types TAB then click the Import Account Types button. The full list of Account Types from MYOB Essentials should be downloaded
- click on the Accounts TAB on the MYOB BUSINESS screen then click on the Classifications TAB then click the Import Classifications button. The full list of Account Classifications from MYOB Essentials should be downloaded
- click on the Accounts TAB on the MYOB BUSINESS screen then click on the Accounts TAB then click the Import Accounts button. The full list of Accounts from MYOB Essentials should be downloaded
Once you have been able to successfully download Accounts and Tax Types you could then try creating a Contact and Invoice in the fmAccounting Link (MYOB Essentials Edition) solution file and pushing that to the Essentials API. If successful you can then login to your Essentials web account and confirm all the FileMaker data has come across correctly.
Once you have managed to authenticate successfully we recommend completing the following steps as you become more familiar with the fmAccounting Link file and start to look “under the hood” at the scripts, tables, relationships etc:
- go to the General tab > Items and download the Inventory Items from Essentials
- you can optionally also download Contacts and Invoices
- navigate to the Contacts section and create a new Contact then upload that to Essentials
- create a new Invoice for this Contact, enter a few line items and then upload that Invoice to Essentials
- enter a payment for the Invoice then upload that Payment to Essentials. View the Invoice in Essentials to confirm the Payment was uploaded
You should know be comfortable with uploading and downloading data between FileMaker and Essentials. You can view each of the scripts in the Script Debugger as you go to see what steps are being taken – we have commented the scripts to explain each step of the process. You are now ready to tackle the integration with your own FileMaker solution.
Make sure you check out our fmAccounting Link file videos – we will be adding more videos in the coming months that demonstrate each of the modules in the fmAccounting Link file.
N.B. as we are continually updating the fmAccounting Link file the screenshots below might not look exactly the same as what you see. Please refer to your fmAccounting Link file for the latest version of these.
Step 1: Custom Functions – Copy and Paste or Import
This requires FileMaker Pro Advanced – you can either copy the Custom Functions from the fmAccounting Link file or you can import them into your solution file. If you already have any of these custom functions installed you can skip those:

Step 2: Tables – Copy and Paste or Import
This requires FileMaker Pro Advanced – you can either copy the Tables from the fmAccounting Link file or you can import them from your solution file:

Depending on your integration and your existing solution file won’t need to import all of the following tables if you already have an existing matching table:
Accounts: this stores the Essentials Chart of Accounts records – if you already have a Chart of Accounts table you won’t need to import this
AccountTypes: this stores the Essentials AccountTypes records – if you already have a AccountTypes table you won’t need to import this
Businesses: this stores a record for each MYOB Essentials Business that is available to authenticate with. You then select which of these Businesses you wish to use when making API requests
Classifications: this stores the Essentials Account Classification records – if you already have a Classifications table you won’t need to import this
Contacts: this stores the Contact records (Customers and Suppliers) – if you already have a Contacts table you won’t need to import this
Countries: this stores the Country records – if you already have a Countries table or all your Contacts and transactions are restricted to just a single Country you won’t need to import this
Interface: this is ‘Preferences’ or ‘Settings’ table that contains a single record. If you already have a single record Preferences table you can use that.
InvoiceItems: if you already have a Invoice Items (Invoice Line Items) table you won’t need to import this
Invoices: this stores the Invoice records – if you already have a Invoices table you won’t need to import this
Items: this stores the Inventory Item records – if you already have a Products/Price List/Inventory Items table you won’t need to import this
Navigation: this is part of the fmAccounting Link demo file and usually will not be required
PaymentItems: this stores the individual line items for a Payment record
Payments: this stores the Payments records (Payments for an Invoice) – if you already have a Payments table you won’t need to import this
Plugins: this stores the plug-ins required by the fmAccounting Link file – if you already have a table for plug-ins you won’t need to import this
TaxTypes – this stores the Tax Type records – if you already have a Tax Types table you won’t need to import this
Step 3: Create Fields in Existing Tables
If you already have existing tables for Contacts, Invoices, InvoiceItems, Payments, PaymentItems, Products and Interface you will simply need to create the required additional fields in each of the tables if you are not going to import these tables. If you have FileMaker Pro Advanced you can use that to copy/paste the fields from the fmAccounting Link (MYOB Essentials Edition) solution file.
Please also note the following special fields that you will need in each table that you are downloading data into and uploading data from:
_kf_MYOB_ID: each table that you download data into or upload data from will require one of these fields (e.g. _kf_MYOBAccountID, _kf_MYOBContactID and _kf_MYOBInvoiceID). These fields store the MYOB Essentials ID (equivalent to a FileMaker Primary Key field/auto enter serial number/UUID). This allows us to update records if we detect the presence of a value in these fields, rather than creating a new record each time in Essentials
LastAPIResult – this stores the last API request result for the current record (e.g. in Contacts, Invoices, Payments etc). It doesn’t need to be displayed on a user visible layout but it helpful to see the response from Essentials API when troubleshooting API requests
MYOB_xxxx_JSON – this calculates the necessary JSON data structure to upload/push a FileMaker Contact record to Essentials. This calculation will need to be updated to resolve any missing field references to reflect the structure of your solution file. You are essentially mapping the Essentials fields to the matching FileMaker fields in Contacts, Invoices, Payments etc. Any table that pushes data from FileMaker to Essentials will require one of these fields, e.g.:
MYOBInvoiceJSON
MYOBContactJSON
MYOBPaymentJSON
Step 4: Relationship Graph – Table Occurrences and Relationships
You will need to recreate the Table Occurrences and Relationships from the fmAccounting Link file in your solution file. Unfortunately FileMaker Pro/Advanced does not currently support copy/pasting or importing of table occurrences and relationships so these will need to be recreated manually. As with importing tables if you did not import certain tables you will not need to recreate table occurrences/relationships associated with those tables you did not import:

Step 5: Create Layouts
You will need to create any necessary layouts in your solution file with the same names as the fmAccounting Link file. If you did not import certain tables then you will not need to create layouts for those tables. At this step you are only creating the blank Layouts with the same name as in fmAccounting Link. You will be copy/pasting the layout objects/content at a later step. As we have not imported any scripts yet copy/pasting layout content would mean any buttons that reference scripts will be broken.
As you will be recreating layouts in your existing solution file we will be assuming that you will with to recreate the layouts using the same theme/style as your existing solution and not necessarily keep the layouts the same as they are in the fmAccounting Link file. The layouts in the fmAccounting Link file use the Cool Gray theme.
The “DEV” layouts are layouts designed for the developer and are kept hidden from users.
We find having the Manage Layouts window open for both the fmAccounting Link file and your solution file side by side is the quickest way to create new layouts in your solution file. You can quickly copy the Layout Name from the fmAccounting Link file, create a new Layout in your solution file and paste in the name and then select the correct table occurrence to use in the Show Records from menu.
Step 6: Scripts – Copy and Paste or Import
You can use FileMaker Pro/Pro Advanced to either copy/paste or import the scripts from the fmAccounting Link file. You should import all scripts in the following folders:
MYOB Business
Accounts
Contacts
Items
Invoices
Payments
You can generally not import scripts in the following folders as they are used in the fmAccounting Link demo file and usually not required for your solution file:
System
Developer
Do import this script from this folder:
System Install Solution Plugins
N.B.: some of the scripts perform other scripts which include script parameters which are referenced by the calling script (e.g. when performing the authentication script step and passing the keys for the API authentication script). If you are creating these scripts yourself make sure you include the script parameters. We use the NightWing Enterprises method for passing multiple script parameters which requires the DeclareVariables custom function. You can change this to your preferred method for passing multiple script parameters as required.
Step 7: Value Lists
You will need to recreate the Value Lists from the fmAccounting Link file in your solution file. Unfortunately FileMaker Pro/Advanced does not currently support copy/pasting or importing of Value Lists so these will need to be recreated manually:

Step 8: Layout Contents – Copy and Paste Layout Objects/Content
Now that we have the necessary value lists and scripts in your solution file you can now copy/paste the Layout objects/content from the layouts in the fmAccounting Link file. You will first need to size the layouts and layout parts to the correct sizes, or you can customise these to suit your requirements. We are assuming that you will be changing the layouts to match your existing theme and styles, but whilst you are testing the integration you can copy/paste these “as is” and once everything is working you can then come back and restyle the layouts to suit your requirements.
Step 9: OnFirstWindowOpen Script Trigger
The fmAccounting Link file has a OnFirstWindowOpen Script Trigger set via the File Menu>File Options:

The OnFirstWindowOpen Script script performs a number of functions that are specific to the fmAccounting Link file, but you may need to replicate some of this functionality in your existing OnFirstWindowOpen Script Trigger in your solution file (or set a OnFirstWindowOpen Script Trigger if you do not currently have one set). The most likely features you will need to recreate in your OnFirstWindowOpen Script Trigger include:
Ensure the BaseElements Plug-in is installed: this is handled by performing the System Install Solution Plugins script as part of the OnFirstWindowOpen Script Trigger:

Step 10: Create buttons for Essentials API Calls
You will need to create some buttons in your existing layouts to perform the following functions (where required):
Authenticate (found on the MYOB Preferences layout)
Import Contacts (found on the MYOB Preferences Form layout)
Contacts: Push to MYOB – Current Record (found on the Contacts Form layout)
Contacts: Push to MYOB – Found Set (found on the Contacts Form layout)
Invoices: Push to MYOB – Current Record (found on the Invoices Form layout)
Invoices: Push to MYOB – Found Set (found on the Invoices Form layout)
Payments: Upload (found on the InvoicesPayments portal on the Invoices Form layout)
Import Items (found on the MYOB Preferences Form layout)
Import Tax Types (found on the MYOB Preferences Form layout)
Import Account Types (found on the MYOB Preferences Form layout)
Import Classifications (found on the MYOB Preferences Form layout)
Import Accounts (found on the MYOB Preferences Form layout)
Items: Push to MYOB – Current Record (found on the Items Form layout)
Items: Push to MYOB – Found Set (found on the Items Form layout)
You can copy/paste these buttons from the layouts in the fmAccounting Link file.
N.B.: some of the buttons have script parameters attached to the button which are referenced by the calling script (e.g. to instruct it to upload the current record or the current found set of records). If you are creating these buttons yourself make sure you include the script parameters. We use the NightWing Enterprises method for passing multiple script parameters which requires the DeclareVariables custom function. You can change this to your preferred method for passing multiple script parameters as required.
Step 11: Essentials API Authentication
You are now ready to start testing your integration. The first step is to ensure you can authenticate successfully with the Essentials API. Once you have successfully authenticated you can move on to the additional modules and test the scripts that you have imported to ensure they are working as expected. We recommend testing in the following order:
- Account Types
- Tax Types
- Classifications
- Accounts
- Items
- Contacts
- Invoices
- Payments
Once you can successfully download and upload using the scripts/buttons that you have imported you are ready to go live.
Step 14: Go Live and switch from a trial Essentials Account to your live Essentials Account
Once you have successfully tested the integration of your FileMaker solution file with the Essentials API using a trial account you can then change the authentication credentials to your live Essentials account and download then select your live Essentials Business record.
Version History – to see what’s new with each update check out the version history log